Are you looking to enhance your WordPress site’s user experience without overwhelming your visitors with too much information? A tooltip might just be the perfect solution! These nifty little pop-ups can provide important context or explanations for your content, all while keeping your pages clean and tidy. Whether you’re a seasoned developer or a complete beginner, adding tooltips to your site can be accomplished in a snap. In this article, we’ll explore three effective methods to add tooltips to your WordPress site—two of which are absolutely free! You can choose between a user-friendly plugin or a bit of custom CSS, depending on your comfort level. Ready to elevate your website’s functionality and engage your audience like never before? Let’s dive in!
Understanding WordPress Tooltips and Their Benefits
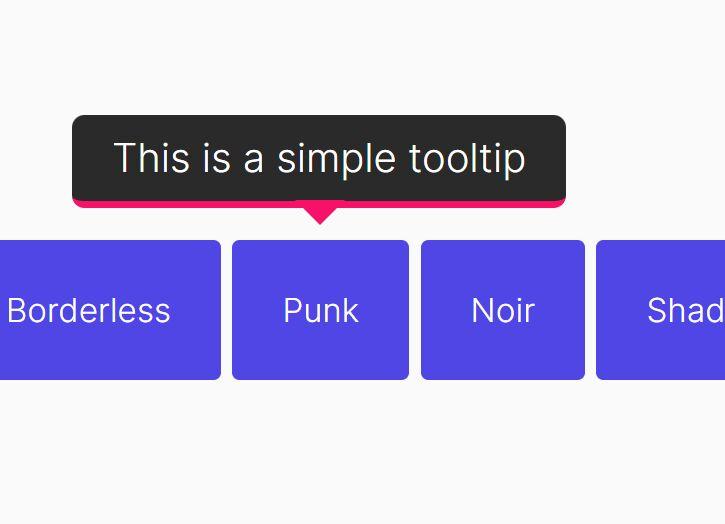
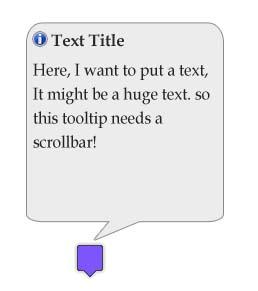
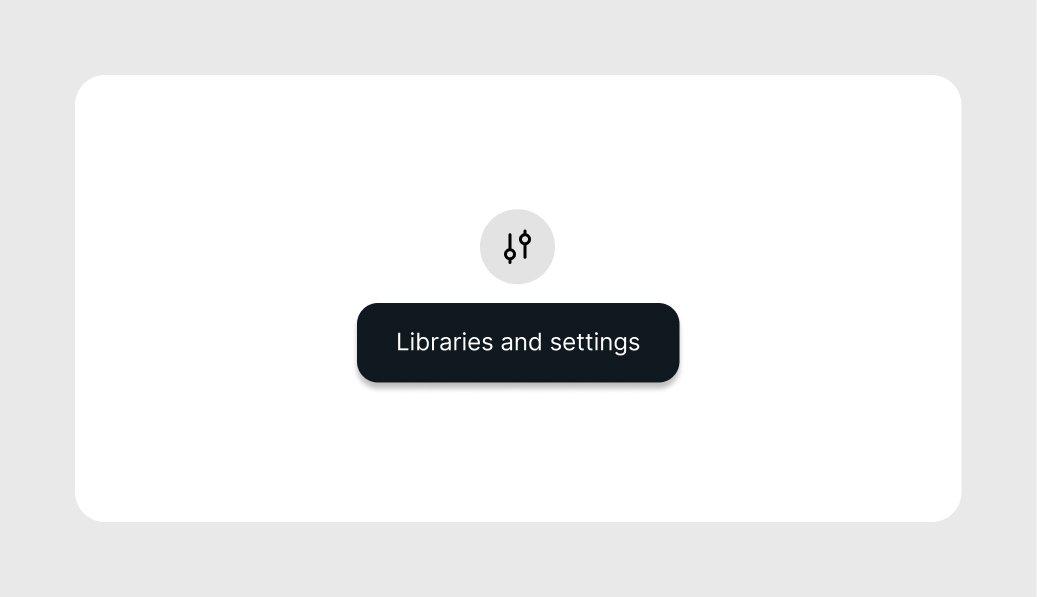
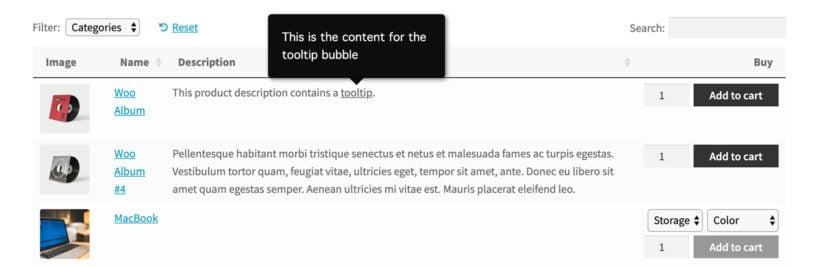
Tooltips are small, interactive text boxes that appear when a user hovers over an element, providing additional information without cluttering the interface. In the context of WordPress, implementing tooltips can significantly enhance user experience and engagement. They serve as a subtle yet effective way to guide visitors through your content, making it more digestible and informative.
One of the primary benefits of using tooltips in your WordPress site is improved user experience. By offering contextual help or definitions, tooltips reduce the cognitive load on your users. Instead of overwhelming them with large blocks of text or complicated jargon, you can present information in bite-sized pieces. This makes it easier for visitors to quickly grasp the content, leading to longer session durations and lower bounce rates.
Moreover, tooltips can act as a visual cue for enhancing the aesthetic appeal of your website. With the right styling, they can seamlessly blend into your design, adding a layer of sophistication. Consider the following advantages of integrating tooltips:
- Clarity: Provide instant clarification without redirecting users away from their current context.
- Engagement: Interactive elements like tooltips can increase user interaction, leading to higher engagement rates.
- SEO Benefits: Improved user experience can lead to better SEO rankings, as search engines favor sites with lower bounce rates and higher user satisfaction.
To better understand the effectiveness of tooltips, consider the following table that summarizes their advantages:
| Benefit | Description |
|---|---|
| User Guidance | Helps users navigate complex information easily. |
| Space Saving | Eliminates the need for excessive text on the page. |
| Customizable | Can be tailored to match your brand’s style and tone. |
Incorporating tooltips into your WordPress site not only enhances usability but also showcases your commitment to providing a thoughtful and user-centric experience. As you explore the various methods to add tooltips—whether through plugins or CSS—you’ll find that the benefits far outweigh the effort. Ultimately, a well-implemented tooltip system can turn a casual visitor into a loyal follower, making it a valuable addition to any website.
Exploring Free Plugins for Effortless Tooltip Creation
When it comes to enhancing user experience on your WordPress site, tooltips can be a game changer. They provide additional context and information without cluttering your design. Fortunately, there are several free plugins available that make tooltip creation not only effortless but also aesthetically pleasing. Here are some top choices to consider:
- WP Tooltips: This user-friendly plugin allows you to create tooltips with minimal effort. You can customize the appearance using simple settings and even add images and videos to your tooltips for added interactivity.
- Tooltipy: Perfect for developers and non-developers alike, Tooltipy offers a range of advanced features. You can customize colors, fonts, and triggers, ensuring your tooltips fit seamlessly with your site’s design.
- Easy Tooltip: As the name suggests, this plugin simplifies the entire process. With a straightforward interface, you can add tooltips almost anywhere on your site using shortcodes. It’s perfect for beginners!
Each of these plugins comes with its own set of unique features. To help you choose the best one for your needs, consider the following comparison:
| Plugin Name | Customization Options | Ease of Use | Additional Features |
|---|---|---|---|
| WP Tooltips | High | Very Easy | Images & Videos |
| Tooltipy | Very High | Moderate | Advanced Triggers |
| Easy Tooltip | Moderate | Super Easy | Shortcodes |
When integrating tooltips into your site, consider the user experience. Too many tooltips can overwhelm visitors, so use them strategically to highlight key information. Whether you’re guiding users through a complex process or providing definitions for industry jargon, these plugins make it easy to display the right information at just the right time.
Ultimately, choosing the right plugin will depend on your specific needs. By leveraging these free tools, you can enrich your content and facilitate better understanding for your audience. Don’t hesitate to experiment with different options and see which one aligns best with your vision!
A Step-by-Step Guide to Using a Popular Tooltip Plugin
To start utilizing a popular tooltip plugin in your WordPress site, follow these straightforward steps. First, navigate to your WordPress dashboard and head over to the Plugins section. Click on Add New and use the search bar to find the tooltip plugin of your choice. Some well-regarded options include:
- WP Tooltips – A feature-rich plugin that is user-friendly.
- Simple Tooltips – Ideal for those seeking a minimalist approach.
- Tooltips for Visual Composer – Perfect for users of the Visual Composer page builder.
Once you’ve selected a plugin, click on the Install Now button, and after installation, activate the plugin. It’s important to thoroughly review the plugin settings, which can usually be found under the Settings or Tooltips menu in the dashboard. Configuring your tooltip options will allow you to customize their appearance and behavior. Look for settings that let you adjust:
- Display Style: Choose colors and fonts that align with your site’s design.
- Position: Decide where you want your tooltips to appear relative to the target elements.
- Animation Effects: Add visual flair with fade, slide, or grow effects.
Next, integrating tooltips into your content is seamless. You can often add them directly through the WordPress editor. For example, you might highlight a term or phrase and use a shortcode provided by the plugin to create a tooltip. The typical format will look something like this:
[tooltip text="Your tooltip text here"]Hover over me![/tooltip]make sure to test the tooltips on different devices and browsers to ensure they offer a consistent user experience. It’s also a good idea to gather feedback from your audience about whether the tooltips enhance their understanding of your content. By following these steps, you can effectively add informative and engaging tooltips to your WordPress site, helping your visitors navigate your content more smoothly.
Customizing Your Tooltip with CSS for a Unique Touch
Crafting a tooltip that stands out can significantly enhance the user experience on your WordPress site. By incorporating custom CSS, you can transform standard tooltips into eye-catching elements that echo your site’s design. Here’s how you can easily achieve that:
First, identify the tooltip element in your CSS. Typically, a tooltip can be styled using the following properties:
- Background Color: Choose a color that complements your site’s palette.
- Text Color: Ensure the text is readable against the background.
- Border Radius: Use rounded corners for a softer look.
- Box Shadow: Add depth with a subtle shadow effect.
Here’s a simple example of CSS you can use:
        .tooltip {
            background-color: #333;
            color: #fff;
            border-radius: 5px;
            padding: 10px;
            box-shadow: 0 2px 10px rgba(0, 0, 0, 0.2);
            position: absolute;
            z-index: 10;
        }
Additionally, consider using animations to draw attention to your tooltips. A gentle fade-in or slide effect can make a notable difference. For instance:
        .tooltip {
            opacity: 0;
            transition: opacity 0.3s ease-in-out;
        }

        .tooltip-visible {
            opacity: 1;
        }
To make the tooltip even more unique, you can create a themed design using a table. Here’s an example layout to consider for your tooltip content:
| Feature | Description |
|---|---|
| Custom Colors | Match your brand’s aesthetic. |
| Responsive Design | Ensure tooltips look great on all devices. |
| Interactive Elements | Add icons or images for more engagement. |
By taking these simple steps, you can create a tooltip that not only serves its purpose but also enhances your WordPress site’s overall visual appeal. Remember, a little creativity goes a long way in making your tooltips memorable!
Enhancing User Experience with Strategically Placed Tooltips
Tooltips are more than just a decorative element on your WordPress site; they serve a crucial role in enhancing user interaction and overall experience. By providing contextual information at a glance, tooltips can guide users through complex features, reducing confusion and improving usability. The placement of these tooltips can significantly impact their effectiveness, making it essential to consider their strategic positioning.
When thinking about where to place tooltips, consider the following:
- Near Key Actions: Position tooltips next to buttons or links that may require additional explanation, guiding users toward taking action.
- Form Fields: Help users by providing brief descriptions or tips directly next to form fields, enhancing form completion rates and reducing errors.
- Navigation Menus: Utilize tooltips in your navigation to clarify menu items, especially for less common terms or features.
Another essential factor is the timing and behavior of your tooltips. A tooltip that appears too quickly can annoy users, while one that takes too long may be ignored. Striking the right balance will ensure they are helpful rather than intrusive. Consider implementing the following strategies:
- Hover Activation: Activate tooltips on hover to provide immediate information without clicking, allowing for a smoother experience.
- Click Activation: Use click-based tooltips for mobile users who may not have a hover option, ensuring accessibility across devices.
Moreover, aesthetics play a vital role in the effectiveness of tooltips. Ensure they are visually consistent with your website’s overall design. Use CSS to style your tooltips, incorporating your site’s color scheme and fonts for cohesiveness. A tooltip that blends seamlessly with your site’s design will feel like a natural part of the browsing experience.
| Tooltip Element | Best Placement | User Benefit |
|---|---|---|
| Button Tooltips | Next to Call-to-Action | Reduces hesitation to click |
| Form Field Tooltips | Above/Below Input Fields | Clarifies input requirements |
| Menu Item Tooltips | Hover Over Menu | Enhances navigation clarity |
By integrating tooltips thoughtfully into your WordPress site, you not only improve user experience but also increase the likelihood of conversions and satisfied visitors. Remember, a seamless user experience is a powerful tool in retaining customers and encouraging them to explore further.
Troubleshooting Common Issues When Adding Tooltips
When integrating tooltips into your WordPress site, you may encounter a few common hiccups that can be easily resolved with a little troubleshooting. Understanding the typical issues that arise can save you valuable time and enhance your site’s user experience significantly.
Check for JavaScript Conflicts
One of the primary reasons tooltips fail to display correctly is due to JavaScript conflicts with other plugins or themes. If you notice that your tooltips are not showing up:
- Disable other plugins temporarily: Deactivate all plugins except the one responsible for tooltips and check for any changes.
- Switch to a default theme: If you’re using a custom theme, try switching to a default WordPress theme (like Twenty Twenty-One) to see if the problem persists.
If the tooltips work after these changes, you can pinpoint the conflicting plugin or theme and look for alternatives or contact their support for resolution.
CSS Customizations Overriding Tooltip Styles
Sometimes, custom CSS added to your theme can override the tooltip styles, making them invisible or improperly formatted. To troubleshoot this:
- Inspect the tooltip element: Right-click on the tooltip and select “Inspect” to see which styles are being applied.
- Adjust your CSS: Look for any conflicting rules in your stylesheet and modify them to ensure your tooltip is styled correctly.
Here’s a simple CSS snippet to help ensure your tooltips are visible:
css
.tooltip {
    background-color: #333;
    color: #fff;
    border-radius: 4px;
    padding: 8px;
    z-index: 1000;
}
Verify Tooltip Activation
If your tooltips are not activating as expected, ensure that the trigger method is correctly set up. Tooltips can be activated on hover, click, or focus, and sometimes a mismatch in these settings can lead to confusion.
- Review your plugin settings: Verify that the tooltips are configured to show on the intended action.
- Check for JavaScript errors: Open your browser’s console (F12) and check for any JavaScript errors that may be stopping the tooltip from functioning properly.
Testing Responsiveness
Tooltips should adapt to different screen sizes, but sometimes they can be misaligned or cut off on mobile devices. To test responsiveness, consider the following:
- Resize your browser window: Make sure the tooltips display correctly as you adjust the size.
- Use mobile emulation tools: Most browsers have developer tools that allow you to simulate mobile devices to check the appearance and functionality of tooltips.
By systematically addressing these common issues, you can ensure a smooth integration of tooltips on your WordPress site, enhancing your content’s interactivity and user engagement.
Best Practices for Designing Effective Tooltips
Tooltips serve as a valuable resource for enhancing user experience on your WordPress site, but their design is crucial in ensuring they effectively convey information without overwhelming the user. To create tooltips that truly resonate, consider the following best practices:
- Keep it Simple: A tooltip should provide concise, relevant information. Aim for a short sentence or two that delivers key insights without unnecessary jargon. This helps users quickly grasp the context without feeling bogged down.
- Consistent Styling: Use a consistent color scheme and font that aligns with your website’s branding. This not only ensures that tooltips blend seamlessly into your design but also enhances readability. A common approach is to use a slightly darker shade of your background color to make tooltips stand out without clashing.
- Strategic Placement: Position tooltips in a way that enhances the user experience. They should appear near the element they are describing, ensuring users don’t have to search for the information. Consider using CSS positioning rules to fine-tune their placement.
In addition, the timing of tooltip visibility can significantly impact usability. Implementing a brief delay before a tooltip appears can prevent frustrating pop-ups when users unintentionally hover over an element. This gives users control and allows them to focus on the content without interruptions.
| Tooltip Element | Recommended Action |
|---|---|
| Hover Area | Ensure it is large enough for easy interaction |
| Text Size | Use a legible font size (at least 12px) |
| Color Contrast | Maintain a contrast ratio of at least 4.5:1 |
Lastly, testing is essential. Gather feedback from users to see how they interact with tooltips. Monitor whether they find the information provided helpful or if they experience any confusion. A/B testing different styles and placements can unveil what works best for your audience.
By adhering to these guidelines, your tooltips can transform from mere annotations to powerful tools for engagement and education, enhancing the overall usability of your WordPress site.

Comparing Free Plugins vs. Custom CSS for Tooltips
When deciding between free plugins and custom CSS for tooltips, it’s essential to evaluate what best meets your needs. Free plugins often come with user-friendly interfaces and ready-to-go styles that make adding tooltips to your site straightforward. They typically offer a range of customizable options, such as different tooltip positions, colors, and fonts, allowing you to create visually appealing tooltips without much coding knowledge.
On the flip side, custom CSS provides unparalleled flexibility and control over the appearance and behavior of your tooltips. With a few lines of code, you can tailor every aspect to perfectly match your website’s theme, enhancing user experience. For those familiar with CSS, this can be a rewarding approach, as it enables you to implement animations, transitions, and precise positioning that plugins might not offer or might limit.
Consider the following points when making your choice:
- Functionality: Free plugins usually come with built-in features that you may find useful, such as responsiveness and interactive elements.
- Customization: Custom CSS allows for unlimited customization, enabling you to ensure that the tooltips align with your brand’s identity.
- Performance: While plugins can add extra weight to your site, custom CSS is often more lightweight and can result in better loading times.
- Maintenance: Plugins may require updates and compatibility checks with WordPress core updates, whereas custom CSS is straightforward to maintain once set up.
To help you weigh your options, here’s a quick comparison table:
| Feature | Free Plugins | Custom CSS |
|---|---|---|
| Ease of Use | ✅ Very Easy | ❌ Requires Knowledge |
| Customization | ⚠️ Limited | ✅ Highly Customizable |
| Performance | ⚠️ Can Slow Down | ✅ Lightweight |
| Updates | ✅ Regular Updates | ❌ Manual Maintenance |
Ultimately, the decision hinges on your comfort level with coding and your specific needs. If you seek quick implementation with minimal hassle, a free plugin could be the way to go. However, if you value customization and are willing to invest some time, crafting your tooltips with custom CSS can lead to a uniquely tailored solution that truly reflects your website’s character.
Maximizing SEO Benefits with Well-Implemented Tooltips
Implementing tooltips effectively on your WordPress site can significantly enhance your SEO strategy. These small, simple text boxes not only provide users with additional context but also play a role in keeping visitors engaged. When users find relevant information easily, they are more likely to stay on your page longer, reducing your bounce rate and improving your overall site performance in search rankings.
One of the primary benefits of tooltips is that they can help to enrich your content without cluttering your design. By using tooltips, you can:
- Enhance User Experience: Provide definitions or additional information without overwhelming readers with excessive text.
- Improve Accessibility: Make complex terms understandable, catering to a broader audience.
- Encourage Interaction: Prompt users to engage with your content, leading to greater time spent on-site.
From an SEO angle, well-implemented tooltips can also boost your keyword strategy. By incorporating relevant keywords within your tooltip content, you can create more context around your main topics. This strategy not only helps search engines better understand your content but also enhances the user’s journey through your site. Remember, the more informative your tooltips are, the more likely they are to be linked to and shared across platforms, generating valuable backlinks.
To maximize the benefits, consider the following best practices while adding tooltips:
| Practice | Description |
|---|---|
| Keep It Concise | Provide short and clear definitions to maintain user attention. |
| Use Relevant Keywords | Incorporate keywords that relate closely to your main content. |
| Design for Readability | Ensure tooltips are visually appealing and easy to read. |
Ultimately, tooltips should serve a dual purpose: enriching your content and enhancing your SEO. Consider integrating them strategically within your articles, product descriptions, or even within your navigation menus. By maximizing the benefits of tooltips, you’re not just improving the user experience; you’re also laying a strong foundation for SEO success.
Wrapping Up: Choosing the Right Method for Your Needs
Choosing the right method for adding tooltips to your WordPress site can greatly enhance user experience and engagement. Whether you’re a beginner or a seasoned developer, understanding the pros and cons of each option is crucial to making an informed decision.
Free Plugin vs. Custom CSS
When opting for a free plugin, you benefit from a quick setup with minimal coding knowledge required. Many plugins come packed with features such as:
- Easy installation: Just a few clicks and you’re set.
- User-friendly interfaces: Most plugins have straightforward dashboards.
- Regular updates: Keep up with WordPress changes effortlessly.
On the flip side, using a custom CSS method provides unparalleled flexibility and customization, allowing for unique designs tailored to your site’s branding. Consider this approach if you are comfortable with coding and want to avoid potential bloat from plugins.
Key Considerations
Creating tooltips might seem straightforward, but it’s essential to assess your specific needs. Here are some factors to think about:
- Site Performance: Too many plugins can slow down your site. If performance is a concern, lean towards custom CSS.
- Maintenance: Plugins require updates and can occasionally conflict with other extensions. A custom solution eliminates this hassle.
- Design Control: If you have a particular vision for your tooltips, CSS gives you full control over styling.
To illustrate how these methods stack up, here’s a simple comparison in table format:
| Method | Pros | Cons |
|---|---|---|
| Free Plugin |
|
|
| Custom CSS |
|
|
Ultimately, the choice boils down to your specific requirements and comfort level with coding. By evaluating the strengths of both methods, you can select the one that aligns best with your objectives and enhances your site’s functionality without complicating your workflow. Remember, the goal is to create a seamless user experience that adds value without overwhelming your visitors.
Frequently Asked Questions (FAQ)
Q&A: How to Add a WordPress Tooltip in 3 Ways: Free Plugin or CSS
Q: What exactly is a tooltip, and why should I consider adding one to my WordPress site?
A: Great question! A tooltip is a small popup box that appears when a user hovers over an element on your website, typically providing additional information about that element. Adding tooltips can enhance user experience by offering context without cluttering your design. They help visitors understand your content better and can even improve your site’s accessibility. Plus, who doesn’t love a site that’s easy to navigate and rich in information?
Q: What are the three ways to add a tooltip to my WordPress site?
A: You’ve got three fantastic options! You can use a free plugin, write some custom CSS, or even employ a combination of both for enhanced functionality. Each method has its perks, so it really depends on your comfort level with coding and your specific needs.
Q: Can you walk me through the first method: using a free plugin?
A: Absolutely! Using a free plugin is probably the easiest way to add tooltips to your site. Simply go to your WordPress dashboard, navigate to the Plugins section, and search for “tooltip.” One popular choice is “WP Tooltip.” Once you install and activate it, you can easily add tooltips to your posts and pages using shortcodes. No coding skills are required—just point, click, and customize!
Q: What about the second method—using CSS? Is that difficult?
A: Not at all! If you’re comfortable with a bit of coding, adding tooltips using CSS can be a rewarding way to personalize your site. You’ll write some CSS rules that define how the tooltip appears, including its styling and positioning. There are plenty of tutorials online to help you craft the perfect tooltip that matches your site’s design. Trust me, once you see how easy it is, you’ll enjoy showcasing your creativity!
Q: Can I use both methods together?
A: Absolutely! In fact, using both a plugin and custom CSS can give you the best of both worlds. You can leverage the convenience of a plugin for basic functionality while customizing the appearance with CSS to truly match your brand. This is particularly helpful if you want to stand out and ensure your tooltips are visually appealing.
Q: Are there any downsides to using tooltips?
A: While tooltips are a great tool for enhancing user experience, there are a few things to keep in mind. Overusing them can lead to information overload or confuse your visitors. It’s best to keep them concise and relevant. Additionally, consider accessibility; ensure that users with disabilities can also benefit from your tooltips by using proper ARIA attributes or ensuring keyboard navigation works seamlessly.
Q: I’m convinced! Which method should I choose as a beginner?
A: If you’re just starting out, I recommend going with a free plugin. It’s straightforward, requires no coding, and you can get started in minutes. As you grow more comfortable, and if you want to take your site to the next level, you can experiment with CSS to add that personal touch. Remember, your website is a reflection of you, so make sure it shines!
Q: Where can I find resources or tutorials for these methods?
A: You’re in luck! There are tons of resources available online. For plugins, the WordPress plugin repository is a goldmine. For CSS, websites like W3Schools, CSS-Tricks, and even YouTube have fantastic tutorials. Don’t hesitate to explore and learn—your site will thank you!
Q: Any final tips before I start adding tooltips to my website?
A: Just have fun with it! Tooltips are a great way to engage with your audience and showcase your content in a new light. Test different styles, gather feedback from your users, and don’t be afraid to iterate. The more you experiment, the better your site will become. Happy tooltipping!
The Way Forward
Conclusion: Elevate Your Content with Tooltips!
And there you have it! Adding tooltips to your WordPress site is a straightforward process that can significantly enhance user experience and engagement. Whether you choose the convenience of a free plugin or prefer the customization of CSS, you’ve got options that suit your needs and technical comfort level.
Remember, tooltips aren’t just nifty little additions; they’re powerful tools to clarify information and guide your visitors. By incorporating them, you’re not just improving your site’s aesthetics, but also making your content more accessible and user-friendly.
So why wait? Take that extra step to enrich your readers’ experience and watch as they appreciate the clarity and professionalism of your site. Dive in, experiment with the methods we’ve discussed, and make the most out of your WordPress site. Happy tooltipping!